Breaking the rules of Hueforge
About a year ago I’ve come across Hueforge, which is a great software for turning 2D images into 3D prints. I’ve experimented with it a little bit, and got some nice results. Here’s the very first image I’ve played with and the result I got:
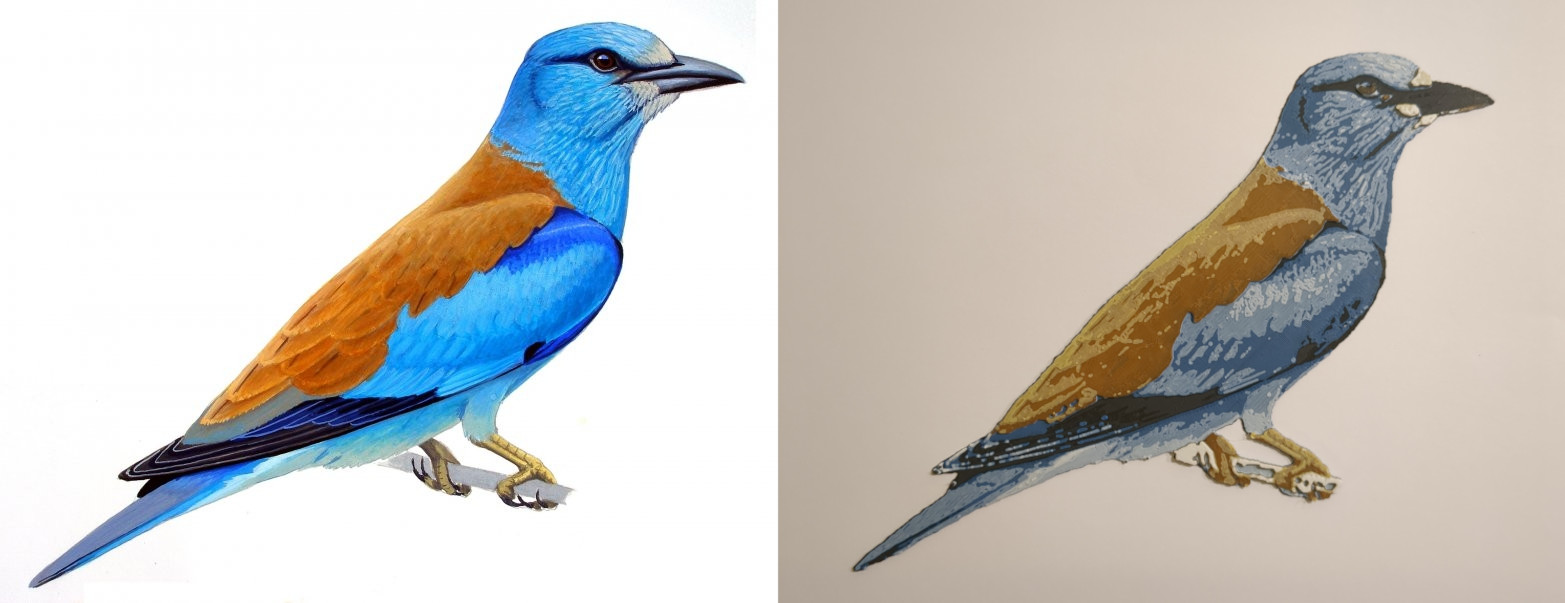
(Original from dunaipoly.hu)
I was sceptical going into this: why use a 3D printer to print something 2D?! I changed my mind quickly. There’s something satisfying about transforming a 2D image into a physical, three-dimensional object.
In this post I first show how the underlying idea of Hueforge works. Then I introduce another technique I’ve come up with that overcomes some of Hueforge’s limitations (while introducing a bunch of others 🙂).
Basics of color blending
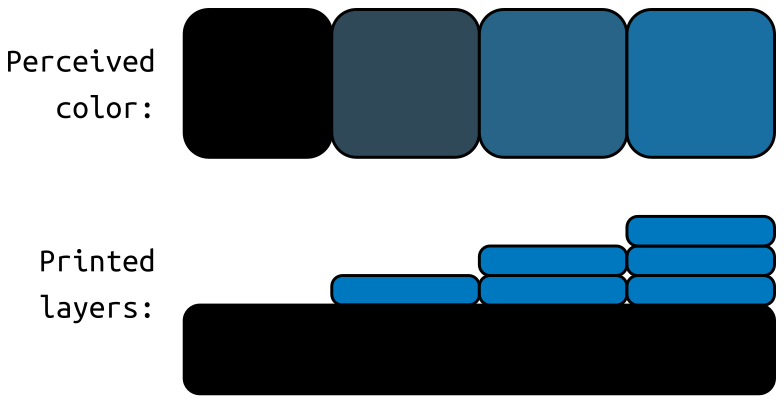
The idea behind HueForge is that printing a thin layer on top of another color, results in a mix of the two. Remember from kindergarten how painting yellow over blue will result in green? 🙂 This allows for a large palette of colors to be printed with only a few colors of filament.
See how different shades of blue can be achieved by printing thin layers of blue on top of black:
Rules of HueForge
The number one rule of HueForge is: one color per layer.
You decide what colors you want to stack on top of each other and in what order, but the switching between them always happens after a layer was completely printed.
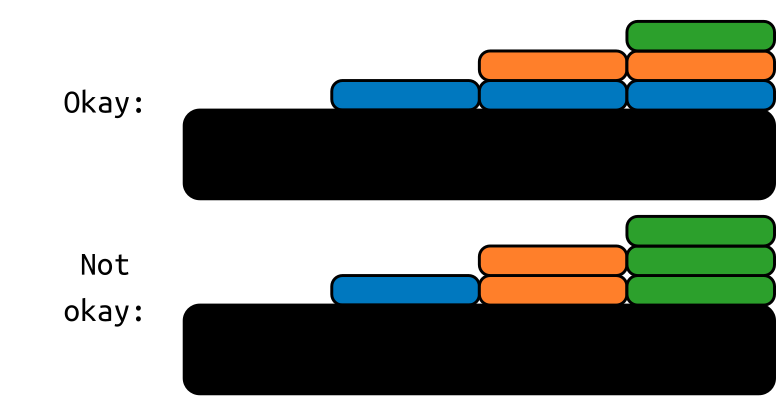
This makes sense as switching between colors is (usually) slow and results in waste so you’d want to avoid it as much as possible. However this also results in the following limitations:
- Uneven surface finish: the surface will be a bit rough as different colors require different heights. This looks cool in some cases, awkward in others.
- Limited color combinations: to get the mixture of two colors, you need to put them directly on top of each other. If you wanted more combinations, you’d need to switch to certain colors more than once, which increases the overall height of the print.
- One-sided prints: the bottom of the print will be filled with the first color. Can’t create patterns on the bottom or two-sided objects.
Breaking the rules
If we allow for color switching to happen within layers, we can achieve prints like these:
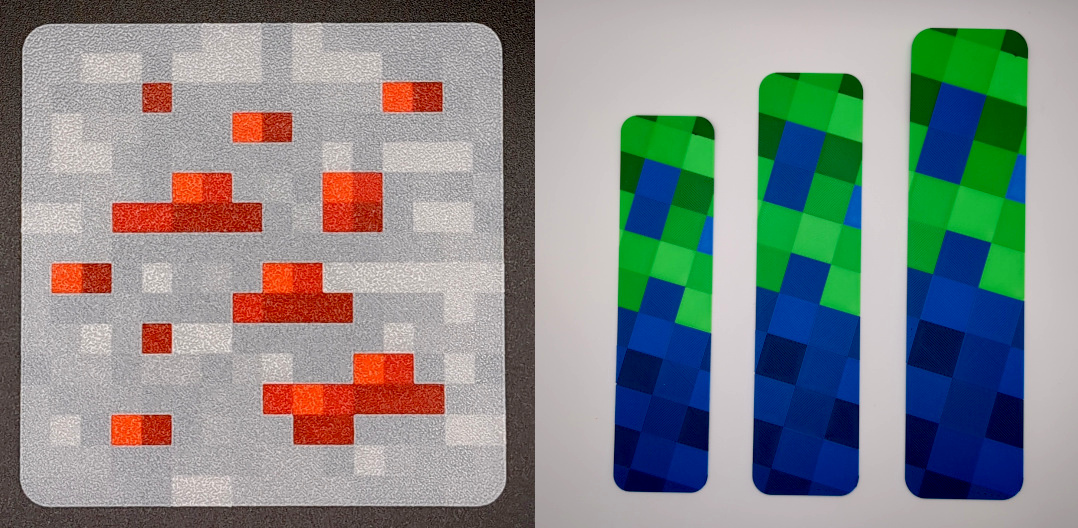
- On the left is a Minecraft themed coaster, with the pattern printed on the bottom, using 4 filaments, resulting in 7 unique colors, flat on both sides. (link to model)
- On the right are bookmarks of different sizes, printed with the same pattern on both sides (mirrored on the bottom), using 4 filaments, resulting in 11 unique colors. Flat on the bottom but has some texture on top. (link to model)
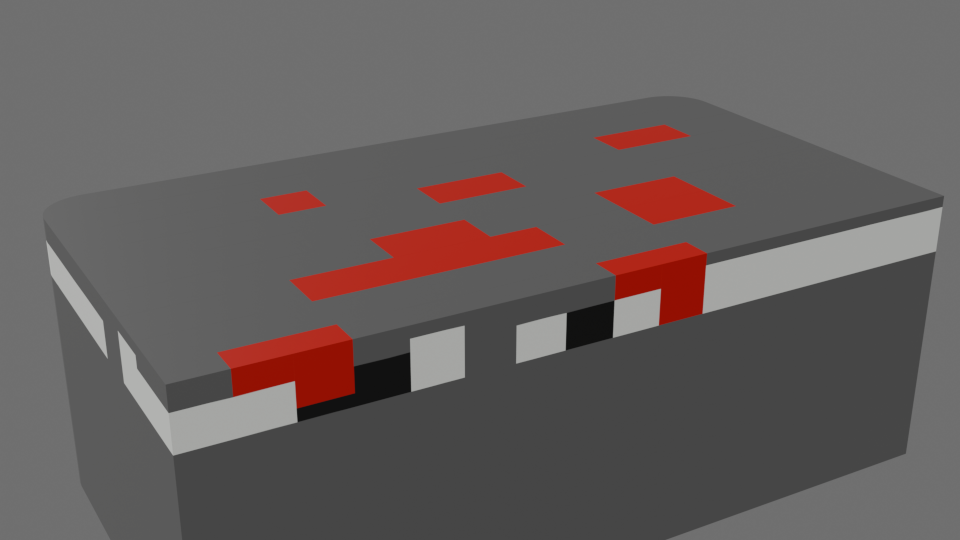
Here’s what a cross-section of the coaster looks like (scaled up 30x on the vertical axis so layers are visible).
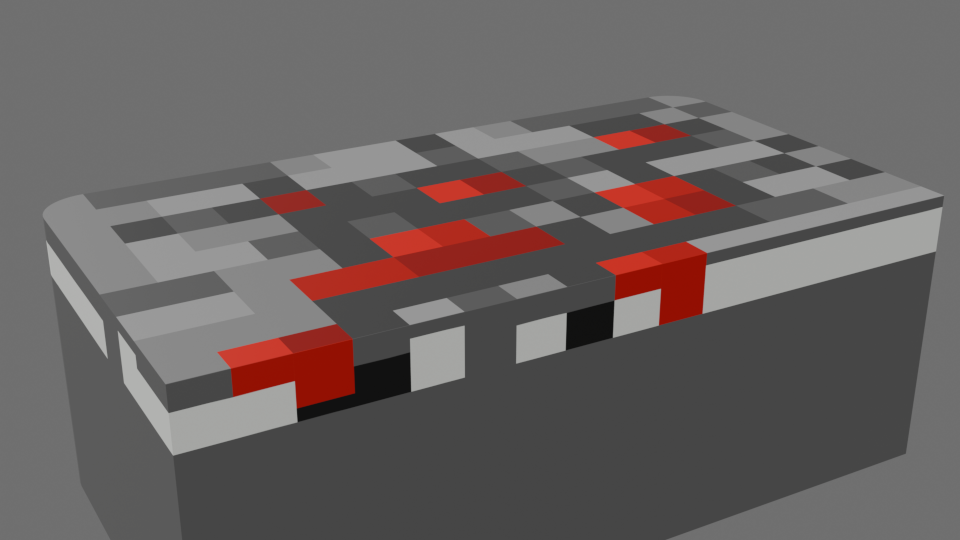
Note how the top is completely flat and the last few layers contain multiple colors. This wouldn’t be possible with Hueforge.
My Method
It’s way more complex than using Hueforge and there are some manual steps involved, but the following works well for simple images.
1. Vector Image
First I create a special SVG, where the id of objects encodes
information about what color combinations will be needed to achieve the desired color.
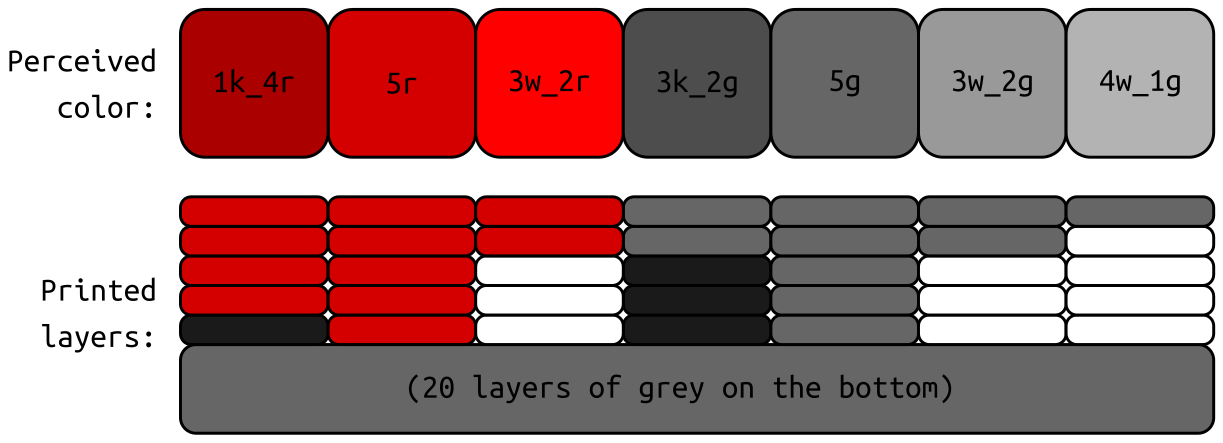
For example, 3w_2r means 3 layers of white and 2 layers of red.
The coaster example is 25 layers tall where the bottom 20 layers are always grey and the top 5 layers make up the desired color. Here’s the palette used:
And here’s the SVG if you’re interested:

🤓 The color of the objects in the SVG technically doesn’t matter, but it helps during designing if it resembles the desired color.
I’m glossing over some details here, e.g. how the bottom 20 grey layers are achieved. If you’re interested, you can take a closer look at the SVG. If you do so, keep in mind that this is supposed to be printed upside-down, that’s why it’s mirrored and why layer order is backwards in the SVG.
2. 2D to 3D in Blender
With a Blender script
I convert the 2D curves from the SVG to 3D meshes using the layer heights defined
in their ids.
Here’s a cross-section of the raw mesh after converting the coaster (vertical axis scaled up again):
3. Export 3MF
You’d think this is simple, but not so much. First of all, Blender needs an add-on to export 3MF. Then even with that add-on, the object names and colors are lost during the export. Without these, it would be impossible to assign the correct filament for each part when slicing the print.
Luckily I was not the first to run into this issue, and there was already a pull request open to fix this. Using this version, I get a 3MF file where the first letter of each object name carries the color information:
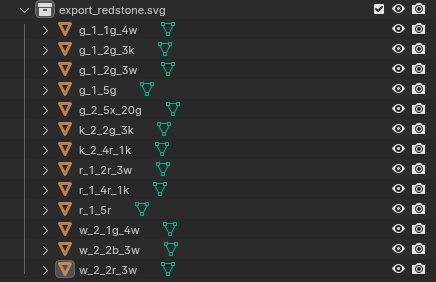
🤓 What do these cryptic names mean?g_1_1g_4wis the1st (grey) part of the1g_4wobject.k_2_2g_3kis the2nd (black) part of the2g_3kobject.
Slicer settings
After importing the 3MF into the slicer, I need to manually set the colors for each part and apply general settings similar to what Hueforge needs (layer height, initial layer height, infill).
🤓 During writing this post I’ve found that there were some updates to the 3MF exporter pull request that might enable exporting the color information as well. Manual setting of the colors based on the object names wouldn’t be required then.
Update 2026-03-19: There’s a new 3MF Import/Export add-on that is compatible with latest Blender versions (5+) and makes exporting color information even simpler.
And that’s it, slice and print! The example coaster takes 1h44m to print and requires
14 filament changes.
Limitations
While overcoming some of Hueforge’s limitations, this method has a couple of its own shortcomings:
- Need an SVG first! And a simple one where you can assign the magic
ids to every object. Overlapping shapes in the SVG can also be a problem. - Need to figure out the color combinations. “How many reds do I need on top to get the correct shade?” I’ve printed a bunch of tests with different number of layers on top of each other but even with that, I’ve had to change combinations when I saw colors on the real models.
- Small details can’t be captured, the nozzle diameter will stop you from going too small. To some extent this is also true for Hueforge, but gets more apparent when you’re trying to create flat tops with this technique.
- Color switching produces waste. 14 filament switches for that coaster will flush ~20% of the filament.
Conclusion
This was a fun experiment that resulted in some nice prints. It’s definitely not a replacement for Hueforge though, but in some cases (for simple images) it can enable things Hueforge can’t.
I’ve already been experimenting a bit with automatically figuring out the available colors based on the filaments at hand and then using that as a palette for turning arbitrary raster images into SVGs that can be printed. It’s a far more complex problem though. Maybe next time… 😉